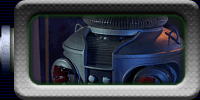
|  Texturing 
              the Torso 
   By 
              Mark Thompson    
 Despite his appearance on TV, the original B9 robot definitely did 
              not have a smooth finish on his torso or treadsection. It's possible 
              to achieve a very similar finish on a replica using products available 
              at craft stores. These instructions use the torso as an example, 
              but the same steps are involved in giving a texture finish to any 
              other robot part.
 Start 
              by making sure you have no flaws in the surface. While the texturing 
              will hide small imperfections, it won't mask glaring mistakes. After 
              the surface is primed, spray on one coat of Plasti-Kote Fleck Stone 
              faux granite finish. This is a water-based product, so it cleans 
              up with just water. That's a good thing, because the stuff flies 
              everywhere! Be sure to mask off and cover anything nearby that you 
              don't want to have a faux finish. Spray in short sweeps and short 
              bursts. You want to achieve even coverage, but let about 50 percent 
              of the primer show through. The product has a tendency to collect 
              in corners, so it's a challenge to go back and even out thin spots 
              without building it up in other spots. Practicing on another object 
              would definitely be helpful. Once you have a satisfactory coat sprayed 
              on, let it dry overnight. The Fleck Stone stays wet for a long time, 
              so for heaven's sake don't touch it! 
 
  
 The next day, lightly hand sand everything down with a medium grit 
              sandpaper. The object is to flatten down the surface to eliminate 
              peaks and points. Don't rub too hard, or you'll take all the Fleck 
              Stone off and have to touch up that spot. Be careful around raised 
              trim, but be equally careful to get in the corners so the surface 
              is as uniform as you can make it. When you're done sanding, vacuum 
              the whole thing off using a brush attachment and spray on a coat 
              of primer to seal and provide a base for the paint.
 When 
              the primer is dry, apply a light coat of your silver paint. Let 
              this dry and then repeat your sanding routine. This time you can 
              bear down harder, because the paint will further seal the texture 
              and create a hard surface. Flatten down the bumps as much as possible 
              without making it completely smooth, although you'd be hard pressed 
              to smooth it out completely. You're aiming for something like the 
              peel of an orange. 
 
  
 After this second sanding, vacuum the surface, spray on a second 
              coat of silver paint, and repeat the sanding. You'll find that each 
              time you repeat this, the surface will get better. You can also 
              move to a finer grade sandpaper if you want. On about the third 
              cycle of sanding and painting, you should get a texture like the 
              one in the photos. When you're satisfied with what you see, you're 
              done sanding. Put on the final coats of paint, and then stand back 
              and admire your work. If you're doing a second or third season paint 
              scheme, you'll mask off the chest area and paint with a charcoal 
              color.


 Now you've got a robot with an authentic finish that won't show 
              the fingerprints of awe-struck admirers!
     |