Claw
Mold Making Claw
Mold Making
By
Scott Sanderson
Preface:
This page details the process of making molds to cast resin claws.
So many times when making a new part you are rushed and do not find
the time to document the process and take pictures, but this time
I made a conscious effort to document entire moldmaking the process.
I hope this gives a little insight on how much work and time it
takes to create a simple mold.
Day
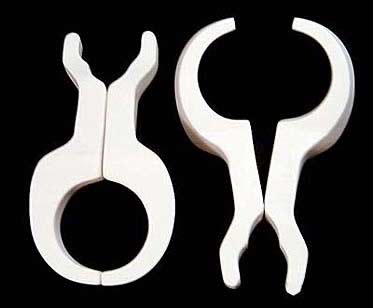
1: First step is to create a highly detailed and refined master.
A little bondo, and some sanding and the claws were ready to go!
Time: 4 hours
Day
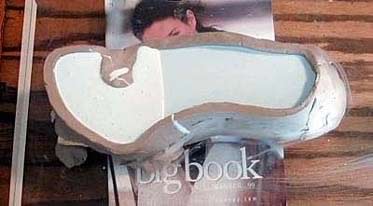
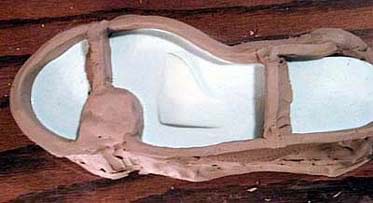
2: Mold making process is started by mounting the master on
a sheet of plexiglass so that it can be divided in half using molders
clay to form the first half of the mold. Special consideration must
be given to where the mold part line will be and also where the
mold will be poured from (in this case the very end of the claw).
Time: 3 hours
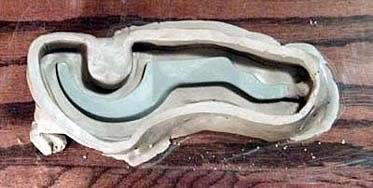
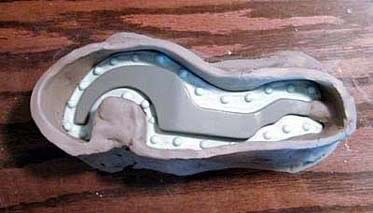
After the claw has been fully sectioned off the area where the clay
meets the master must be cleaned to create a sharp edge free of
debris and all clay residue must be removed form the master. Sides
must be added to the mold box define the width and thickness of
the mold. All gaps must be filled in to prevent silicon from leaking
out of the mold.
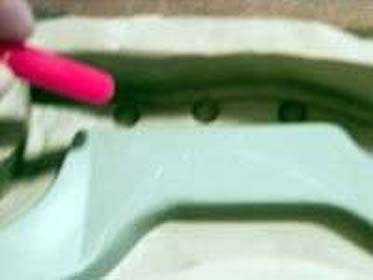
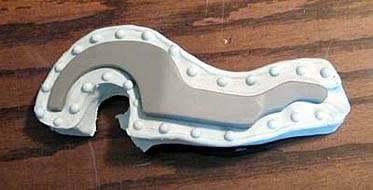
Once the mold box is finished its time to add dimples to the mating
surface so that the mold registers correctly.
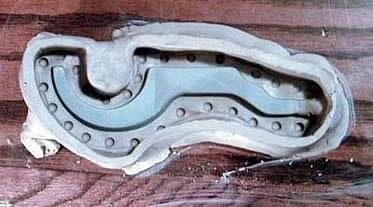
Completed mold box.

An impression coat of silicon is brushed onto the master. This eliminates
bubbles and ensures full silicon coverage without voids or air bubbles.
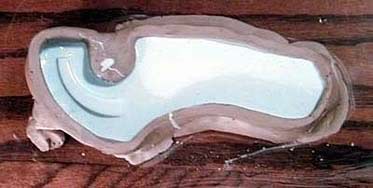
The mold box is filled up the rest of the way with silicon. Notice
because of the angled tip on the claw this process will require
2 pourings. The silicon is allowed to cure overnight.
Day 3: The moldbox is tilted at an angle and the remaining portion
of the mold is filled with silicon and allowed to cure overnight.
Time: 15 minutes
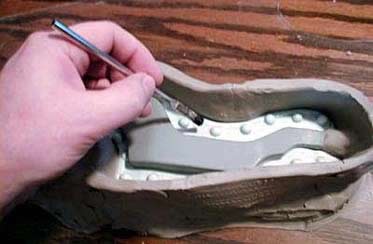
Day 4: After the silicon has cured the clay moldbox is carefully
removed. It is very important to remove all the clay, but critical
that the silicon is not peeled away from the master. If the seal
between the master and mold is broken it will allow silicon from
the second pouring to seep between the mold and master. Once all
the clay is removed the mold and master is cleaned with a brush
and water to remove any clay residue. Time: 2.5 hours
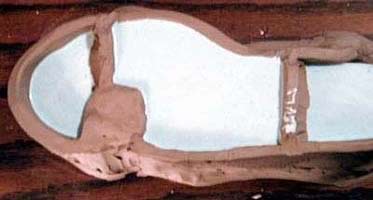
The mold is then remounted to the plexiglass and a new moldbox is
created from clay to form the second half of the mold.
Once the moldbox is completed for the second half, mold release
must be brushed onto the silicone to prevent the second half from
bonding to the first half. Mold release is only applied to the silicon
surfaces and not the master.

Once again the mold box is filled with silicon. Because of the anlge
on the claw, this side will also require two pourings. Note: It
is possible to do the mold in one pouring, but this will unnecessarily
add to the thickness of the mold and increase the cost of the mold
(silicon costs about $115 a gallon!). The mold is allowed to cure
overnight.
Day 5: Once the silicon has cured clay barriers are added to
create a smaller moldbox on top of the first pouring to cover the
remaining portion of the claw. This is allowed to cure overnight.
Time: 20 minutes
Day 6: After the silicon has cured the claw is removed and the
mold halves are separated from the each other and the master. The
halves are then cleaned to remove any remaining clay residue. The
first mold is completed and will sit for a few days to fully cure.
Time: 30 minutes
Day 6-7-8-9: Repeat steps from Day 2 through Day 6 to make the
mold for the second claw half. Note: the second claw mold could
be start in parallel with the first, however because of the time
required and amount of clay needed it was not practical. Time:
6 hours, 35 minutes
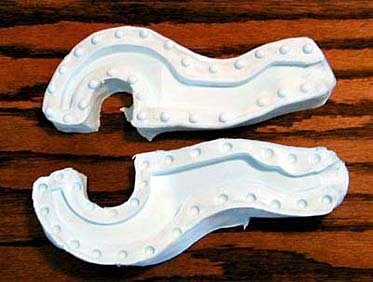
Day 9+: Now its finally time to make the first set of claws
and remove the flashing from the mold part line. Completed set of
resin claws pictured below. Note: without careful planning and execution
you can waste 9 days, a gallon of silicon, and still not have useable
molds! Time 1.5 hours
Total
hours to make the molds: 17 hours, 10 minutes.
Material cost: $115 (one gallon of silicon), plus clay, clay tools,
etc.
|