Updated 08/18/2008-
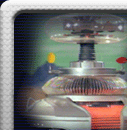
Pictures and a video Robot.avi
(3.4 MB)


Updated 05/15/2008-
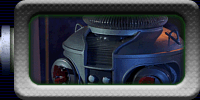
Picture and a video B9
002.avi (2.84 MB)

Updated 08/16/2007-
I'm back at
work on the 2 robots.
The first thing I did is take off the pipe insulation on all of
my knees.
I want to buy a router to make my knees the right way. So I painted
my knees black for now, untill I get a router.
I gave my tread boxes another coat of paint to fix them up.
I put my wheels on that I made out of cardbaord and my treads
are made out of cardbaord now my treadboxes look great.
My robot leg got a coat of black paint. Now I have to wait for
them to dry in the sun.
I put in new light rods they are a little big I put in new flashing
light on light rods. My torso is about the same I just
put in new lights in it.
The arm are the same to hold them in place
I put in machine screws 3 in each arms. I like how it coming
out so far it a big new look for me. ok I put all new lights
in and it works for me. I will have more pictures soon and
a very short movie to let you see the lights work. I hade ordered
a one channal light organ minikit to have my light flash when
the robot talks. On my tread boxes I put some wood under
it with some screws. This way when I put my home made wheels
on it wont touch the floor.. I fixed my tread boxes I put pieces
of wallpaper on the front and back and sides. It came out great
now I have to paint it. My tread boxes have a new look now.
My legs will stay the same. Now Im working on the torso. For
me I like what I did for now. I will have more later.
The gold torso is my son's robot that I got for christmas have
more on that soon.
Joe N B9-0156


Updated 12/11/2006
- New Photos


Updated 10/27/2006
HI GUYS,
I'M STILL WORKING ON THEM.
ON THIS ONE I PUT THE ARMS IN AND THE PIECES FOR MY NEON. I'M
WORKING ON THE MOUTH OF THE ROBOT. I'M PUTTING TOGETHER
THE VOICE ACTIVATED SWITCH FOR THE LIGHT TO BLINK. I CAN'T
WAIT TO PUT THIS TOGETHER. NOW ALL I HAVE TO DO IS
PUT THE CLAWS AND WRIST PLATES ON THE ARMS. THEN PUT THE
PROGRAMMING PANEL IN PLACE. THEN I HAVE TO HOOK THE LIGHTS
TO THE PROGRAMMING PANEL TO TURN ON AND OFF. I HAVE TO WORK
ON THE TREAD BOXES AND THE LAST IS THE POWER PACK. MY FRIEND
NOW WILL HELP ME ON THAT. HE WILL HELP ME TO TURN THE LIGHTS
ON AND OFF WHEN I PULL OUT THE POWER PACK. THANK YOU ALL FOR YOUR
HELP.
JOE N.

Updated 10/11/2006
Here are some pictures of the new work.


Updated 05/01/2006
HI GUYS,
IM WORKING ON THE TWO COLLARS THIS MONTH.
I WANT TO SAY THANK YOU TO STEVE G. AND DAVID H. FOR HELPING ME
BEND THE RIBS. I THANK YOU BOTH FOR YOUR HELP.
THE RIBS CAME OUT GREAT. NOW I CAN START. I CUT THE RIBS
TO SIZE. I CUT THEM ALL FOR THE GOLD ROBOT. I'M GOING
TO USE MY HOT GLUE GUN TO PUT THE RIBS ON THE COLLAR FOR THE GOLD
ROBOT. THIS IS FUN TO DO. NOW IT IS TIME TO CUT THE
RIBS FOR THE OTHER ROBOT. NOW I WILL CUT THEM TODAY.
NOW I WILL CUT THEM DOWN. 108 PIECES ARE DONE.
I GLUED THEM ON WITH THE HOT GLUE GUN.
THE HOT GLUE HOLDS THEM IN PLACE VERY GOOD. AFTER IT DRYS
IT HOLDS THEM IN PLACE GREAT. I HADE TO FIX THE TORSO
ON THE OTHER ROBOT BECAUSE WE HAD A PARTY FOR MY LITTLE GIRL AND
ONE OF THE KIDS KNOCKED IT OVER. SO I HAD TO FIX IT.
IT WAS FUN, I JUST HAVE TO PATCH IT UP.
TODAY I CUT THE OTHER RIBS AND I DID THEM THE SAME WAY, I HOT
GLUED THEM DOWN. THANKS TO BOB G. FOR THE PRINT FOR WHERE
THE RIBS GO IN PLACE. NOW THE TWO COLLARS ARE DONE. NOW
I WILL TRY TO MAKE THE VENTS FOR THE ROBOTS. I WILL USE
BOB G.'S PRINTS TO MAKE THE JIG FOR THE VENTS.
I WILL TRY NOT TO BURN MY FINGHERS THIS TIME.
I'D LIKE TO SAY THANK YOU FOR THE HELP ON THE RIBS FOR THE COLLAR.
TILL NEXT TIME, THE SAME B9 BUILDER CLUB MEMBER WILL HE BURN HIS
FINGERS.
JOE N. B9-0156


Updated 01/30/2006


11/23/2005
Part 7
HI GUYS,
TODAY CHECKED ALL MY LIGHTS AGAIN. I'M USING CHRISTMAS
LIGHTS FOR THE GOLD ONE.
I CUT THE STRING OF LIGHT UP. FOR THE LIGHTRODS I USED STRAWS
AND CHRISTMAS LIGHTS 4 LIGHTS IN THE BRAIN. MY ROBOT BRAIN
IS MADE OUT OF POSTERBOARD FOR THAT. I HOOK UP ALL THE LIGHTS
UP. NOW FOR THE POWER I'M USEING A TRAIN TRANFORMER FOR
THE BUBBLE LIGHT .
ON THE TRANSFORMER THERE ARE TWO SIDES ON IT ONE FOR THE TRACKS
AND THE OTHER SIDE FOR LIGHTS FOR THE HOUSES AND OTHER THINGS
SO I AM USING THAT SIDE FOR THE BUBBLE.
THE BELLY LIGHTS ARE ON ANOTHER TRANSFORMER FOR THE SETS OF LIGHTS.
ALL THE LIGHTS WORKING. NOW ALLI HAVE TO DO IS THE COLLAR
AND THE VENTS LAST THING IS THE POWER PACK.
BOTH ROBOTS ARE ALL MOST DONE FOR CHRISTMAS. I HAVE THE GOLD ONE
ON A PLAT FORM WITH SOME OF MY CHRISTMAS THINGS.
MY SON WOULD LOVE TO SEE IT. THE ATHER ROBOT I STILL HAVE
TO DO IS THE NEON STILL THE SOME WAY. AND ON THAT ONE
I HAVE TO DO THE COLLAR AND THE VENTS.
SO THEY ARE ALL MOST DONE. ALL THE LIGHTS WORK IN BOTH OF
THEM. SOON I WILL HAVE PITCHERS OF BOTH TOGETHER.
THANK YOU ALL FOR LOOKING AT MY PICTURES.
PAGE8 COMMING SOON


11/08/2005
Part 6
HI GUYS,
HOW ARE YOU ALL TODAY,
I PUT MY CHEST LIGHTS IN MY ROBOT THEY LOOK GREAT.
I PUT THE KNOBS ON TOO. I'M WORKING ON MY ARMS TODAY, I'M DOING
IT THE WAY ITHE I DID WITH MY VERY FRIST ROBOT I MADE IT OUT OF
POSTER BOARD.
I MADE A ROUND TUBE AND PAINT THEM BLACK AND SILVER. IN THIS CASE
I HAVE TO MAKE 2, SILVER AND GOLD.
ONE FOR EACH ROBOT. I MADE MY CLAWS OUT OF WOOD.
MY WIFE LOOKED AT HOW THE ROBOT ARE COMING OUT.
I SANDED THE CLAWS AND I PAINTED IT. THEY LOOK GREAT ON THE ROBOT.
MY WIFE LOVES THE GOLD ONE.
I MIGHT CHANGE THE ARMS I REALY DONT LIKE THEM.
I WORKED ON WERE THE NEON GOES, I PUT PAPER THERE AND PANTED IT
RED.
BEHIND THE PAPER I PUT A LIGHT SOCKET IN THE BACK OF IT .
I ORDERD 2 COLOR ORGAN/SOUND ACTIVATED LIGHT SHOW BOARDS.
WHEN HE TALKS THE LIGHT WILL GO ON ANF OFF JUST LIKE THE NEON.
THAT COAST $4.95 EACH. I HAVE THAT DONE NOW.
I AM WORKING ON THE BRAIN FOR THE GOLD ONE, I HAVE A BRAIN FOR
MINE .
I WENT TO THE CLUB SITE AND DOWN LOADED THE PATTEN FOR THE BRAIN.
I GLUED IT TO POSTER BOADERD I CUT IT OUT AND THEN GLUED IT TO
THE SHAPE OF THE BRAIN THAT I HAVE.
I ONLY PUT THE EYES IN THE LITTLE HOLES I CAN'T CUT OUT.
I PAINTED IT GOLD. I PUT THE BRAIN CUP IN THAT SOME ONE GAVE ME
FOR MY SON'S ROBOT.


NOW I HAVE TO PUT THE LIGHTS IN IT.
SO I HOPE TO HAVE THEM DONE BEFORE CHRISTMAS.
PAGE 7 COMING SOON.
10/17/2005
Part 5
Hi gang,
How is everyone today?
I'm going
to work on the chest lights and my neon place.
I went to radio shack and got t-3 1/4 miniature bayonet lamp basepart
number 272-325 they will be the belly lights and 2 will be the
chest lights.
It came with 1 red and1 green lens. The club lens will fit
a little bit.
Ii will start with with this first. So i will use my
new radioshack coldheat cordless soldering tool my wife got me. I
never used on like this one.
I used my new solodering tool, it works great. I put all
my lights on now I will put it in its place. It works, it
works! I like what I did so far.
The lights make these robots look good. Some of my lights
will blink and some won't blink. Now I have to hack it up.
I put the chest piece on the robots. Now I have that done.
So I will take a break for a week.
Part 6 coming soon.


10/03/2005
Part 4
I started
working on the radar pieces today.
I started puting it on the collar bottom. I think I
made it too high.
I have to take some pices off the radar later once I do that I
will put the ear pices that sent me. The ear pices are great.
It will look great on the robot.
Now I have to paint the torsos next week. My son's robot
will be painted gold. I put new trim around the robots.
Now I can paint them. I have to get the radar
now. Be back soon.
I have started the radar today. I cut all the pieces out
and sanded them down, glued them together. Now I have to
start the collar I have to get the ribs bent for them. I
will have it done in Oct. I tried the bubble on top it looks
great on him. My wife likes it too. Thank you Mike J.
I still have more legs to cut out I will do that first.
9/30/05
I did cut all my legs out and put the pipe tape on the other legs
now it looks taller now.
Now I will paint the robot on sat. I have to put some
pieces on the treads on the treadboxes and the knees hangs I made.
The 2 robots look great. My sons robot looks great with
the parts I got from my friends.
I have to work on the lights on the torsos now, I will do that
this week.
Now I will paint. The paints are gold, black,silver.red.
yellow. I hope you all like them.
My son will be happy with the work I did on them. He will be happy.
I painted the legs and knees with dupli color undercoatand I put
on the torsos stone textured paint.
I like what the torsos look like they came out great now I can
put some of the parts on what my friends sent me.
I'm going to put the treads on now. I made them out of cardboard
and I painted them with dupli color undercoat. I will put
them on today.
Today is sunday 10\2\05, I will start working on the lights and
the collars this week.
I hope you like them, please let me now what you think of them.
Joe


09/14/2005
Part 3
I did not
want to do the robot for a long time.
My wife kicked me in my butt. She said to me to stop feeling
bad, your son would like you to get them done. So
I said ok. I want to put one in my son's room. So
I will get going on the torso.
Now I will put aluminum paper on the top of the torso. When
I get done with that I will start putting on aluminum screening
on the top and the bottom of the torso.
This will help hold the plaster on it. Now it is time to
put the plaster of paris on the top.
I will let that dry for about 2 days, then I will do the bottom
next.
I have found more wood to do the rest of my legs. I will
let the plaster dry now.
I will work on cutting the rest of the legs out next.
When that dries I will sand it and do it again with the plaster.
It is coming out great.
I have the torso done with the plaster. Next i will paint
the torso. I have to put in the arm pieces now. Now
I will cut the rest of my pieces out this weekend.
I hope you all like it so far.
Until next time,
Joe


8/09/05 Part
2
Hi to all
my freands in the B9 Club,
How are you
all?
I started puting my torso together. It is taking time to
do when you have kides at home.
I put the base together for the collar. I'm going to get
the rods for the collar next month.
I still don't now how I'm going to cover the torso yet. I
think I'm going to do what I did to my other robot, I used plaster
for the torso and that worked out good. My 2 new robots
are coming out great. I have to take my time on them now,
I have to put the arm holes on the torso now. I used
the same wood for my torso like I made my tread boxes.
The wood was free. If you look at my tread boxes you will
see the same wood.
I started puting the the holes in my torso for the arms. I
am going to do itthe same way I did to my other robots. I
used plaster to cover it. I hope you like what I did so far.
Part 3 coming up soon!
Jjoe N. B9-0156


05/09/2005
Hi to all
my friends at the B9 Club!
My name is Joe Norman, B9-0156, I have been in the club for a
long time. I was in the club for 3 years when my friend
Dewey had it.
I've been working on my Robot for a long time. I made one
out of cardboard and paper mache. That Robot is on
the club site.
Now I'm working on a good Robot for my kids. I have 5 kids,
3 girls and 2 boys. My 8 year old boy wants to help me.
Now my Robot will be made different from all of yours, I
do not have a lot of money to do this.
I want to to make 2 Robots for my 2 boys, so I will start now.
Now you have to remember that I do not have a lot of money.
I went for a walk today, I found some wood paneling so I picked
it all up. Now I'm going to use this for my Tread boxes.
I took out the Mark Thompson prints that I have. I have
1/2 inch thick pieces of wood for the parts I need to put it together.
Now, I have two boys, I have to make two.
I traced all the pieces and cut them out.
Now I put it together, I used wood glue and drywall screws about
2-1/2 inches. I put them together and I like them. I'm
not done with it yet. The wood panels did a great job.
Now I have to work on the wheels and tread belts too. I
will like to start on them.
Please let me know what you think of them, tell me what else I
can do to them. You can tell me on line on the B9Builders
list.
Thank you!
Joe Norman,
B9-0156
PS I
hope you all like it. I'm not done with it yet.


