Radar
Construction #2 Radar
Construction #2
By
Mike Loewen
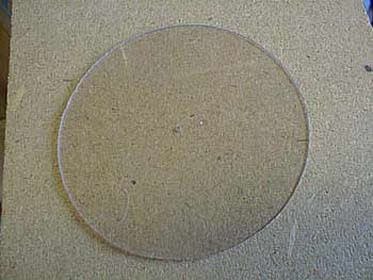
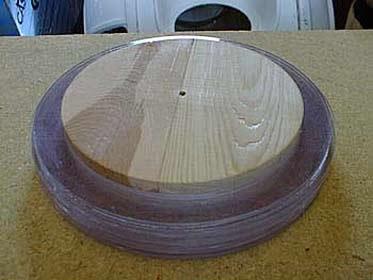
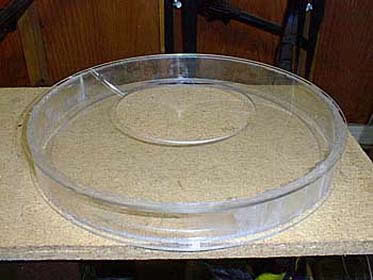
Basic Disc
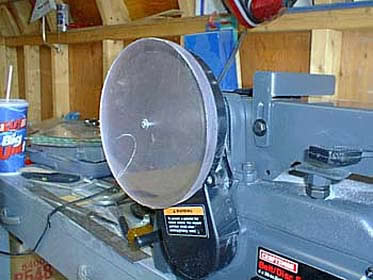
Modified Sander
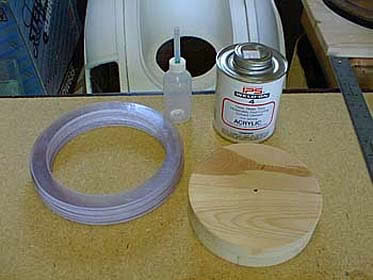
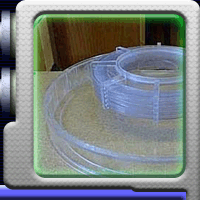
Ready to Glue
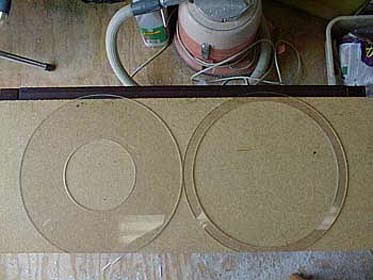
I found a bin full of scrap plexiglass at a local surplus store,
and stocked up on 1/8" sections. I used a Rotozip with the
circle cutting attachment to cut out 10 discs, 5 each of 6-7/8"
and 7-1/8". In order to do the final sizing and sanding, I
modified my Craftsman Disc/Belt Sander by drilling and tapping a
6-32 hole in the shaft. I then stacked up each set of 5 discs and
bolted them to the shaft, fired up the sander and used a double-cut
mill file (for plastics) and progressively finer sandpaper to cut
the discs down to size and sand them. Back to the Rotozip again
to cut out the center of the discs, to leave a hollow 5-1/2"
interior. Then, the stack is ready to be glued with Weld-On #4 (acrylic
solvent).
Centering the Stack
Welded!
Adding the Top
To keep the discs centered, I cut two 5-1/2" wooden discs,
sized and sanded them and glued them together. It was then easy
to slide each disc on the stack, smear it with Weld-On #4 and drop
the next disc on. I also ran the needle around the edge of each
disc so that capillary action distributed more solvent between the
discs. Finally, I cut a 2" hole in the center of the top disc
and welded it to the stack.
Center Ring Added
The 4-1/2" ring on top of the stack was made by welding a 1/4"
and a 1/8" piece of acrylic together, cutting a disc with the
Rotozip, and sizing and sanding the outside. Then the center was
cut out with the Rotozip to leave a 1/8" ring, sanded and then
welded to the stack. I found that when cutting circles with the
Rotozip circle cutting attachment, you should drill a pilot hole
for the Rotozip bit to fit into, then insert the center and bit
into their respective holes before applying power.
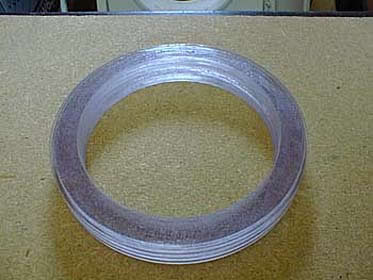
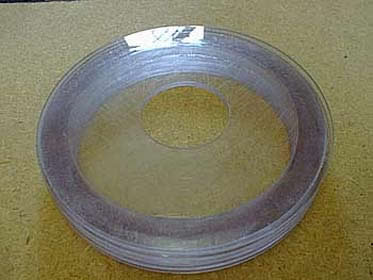
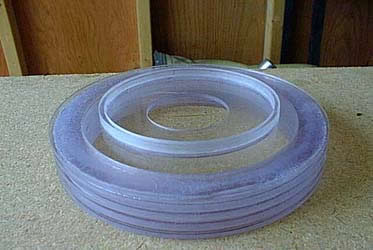
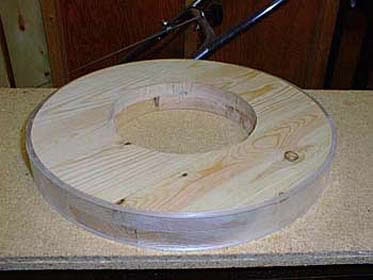
Large Discs
The two large 12-5/8" discs for the bottom section were cut,
sized and sanded together, then a 5-1/2" hole was cut in the
top disc to match the stack, and the bottom disc was cut to leave
a 3/4" wide ring. Be aware that when spinning the discs together,
the friction heat from sanding and grinding tends to fuse the edges
together and they're hard to pry apart.
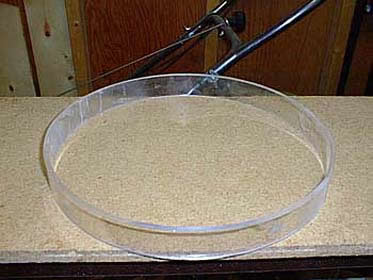
Large Wooden Form
To make the 1-1/4" high center ring for the bottom section,
I cut two long strips out of 1/8" acrylic and fashioned a circular
wooden form 12-1/8" in diameter. Then I heated the first strip
in the oven at 275 degrees for a minute or two, bent it around the
form and glued the ends with Weld-On #16. After the first strip
had set, I heated and formed the second strip around the first.
I then clamped the strips and worked my way around the circle using
Weld-On #4 to fuse the strips together. When I reached the end I
found that I had a slight gap, so I mixed a slurry of acrylic shavings
with Weld-On #4 and used that to fill the gap.
Bottom Center Ring
Clamps
Center Section
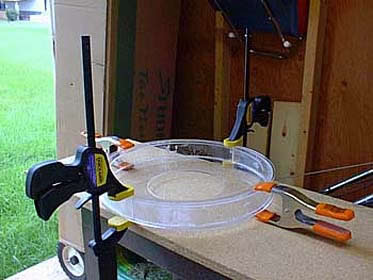
I had a little sanding to do after the solvent dried on the center
ring (that Weld-On runs freely), but I ended up with a fairly round
ring, 1/4" thick with an outside diameter of 12-3/8".
Then I attached the top and bottom plates with Weld-On #16, one
at a time, and clamped them to dry.
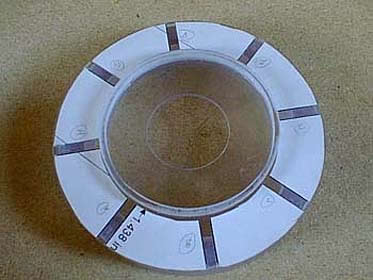
Alignment Decal
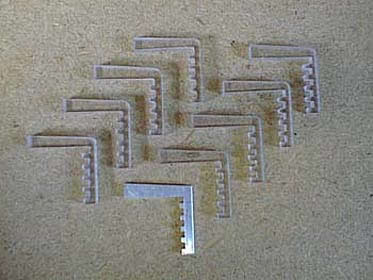
Vanes
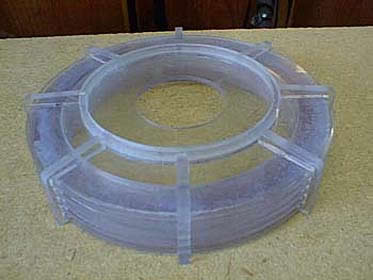
Vanes Attached
Despite my best efforts at keeping things centered I ended up
with some variation, and the vanes for the top of the stack had
to be individually fitted. I printed the image on removeable label
media and stuck it to the top as an alignment guide. The 8 vanes
were cut from 1/4" acrylic, each one traced from an 1/8"
aluminum template that I cut. The slots were started with a Dremel
tool with a medium size ball cutter, and finished off with a bastard
file. I opted for rounded edges on the vanes, as that seems to fit
better with most of the screen captures I've seen. Finally, the
vanes were attached to the stack with Weld-On #16.
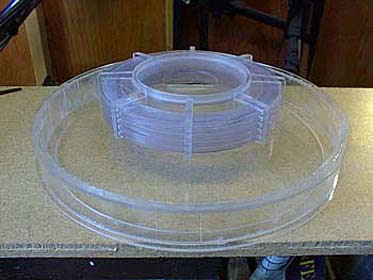
Radar Section
Finally, the stack is attached to the lower section with a bead
of Weld-On #16, followed by Weld-On #4 around the inner edge. What
I ended up with has a lot of room on the inside for motors, electronics,
etc
Final
Thoughts
I learned a lot during this project, and went down a few false trails
in the process. My initial idea for forming the center part of the
middle section was to use a wooden form with the center cut out,
rather than a round form. I soon discovered that it was nearly impossible
to bring the edges together inside the form. I also discovered that
the smoked gray acrylic I had originally picked out for the center
didn't work well with either Weld-On or Goop. Also, I should have
heated the long strips for the center a bit longer, as they ended
up with some stress cracks.
The
other thing I learned about acrylic is, that 1/8" acrylic does
not necessarily measure 1/8". The stuff I found is close, but
slightly smaller. The biggest effect this discrepancy had was on
the small center ring on top of the stack. Because the 1/4"
and 1/8" pieces I welded together didn't quite add up to 3/8",
I had to modify the vanes a bit so they wouldn't go all the way
up to the top of the ring.
After
I had run out of the media I used to cut the discs for the stack,
I found some different stuff for the large discs for the lower section.
To my dismay, this new stock cut VERY badly with the Rotozip, with
large chips all around the edges. I finally found some more acrylic
similar to what I had used for the small discs, which cut much smoother.
|