


 |
|


| Parts Store ->Vendors->Craig Reinbrecht View this Vendor's Feedback | |||
Email craig@bex.net Vendor since: July 7th, 2003
PLEASE READ - Notice to my fellow Builders Email communications: Due to my job and family responsibilities, I may not be able to check my email everyday, so please be patient. I do answer all mail, even if it takes several days.
Some parts may require a wait of up to 3 to 8 weeks, particularly labor-intensive parts such as the Neon. However, I do not accept or request any payment until all parts are ready to ship.
Payment:
Disclaimer:
Index of Craig's Quality B9 Robot Parts
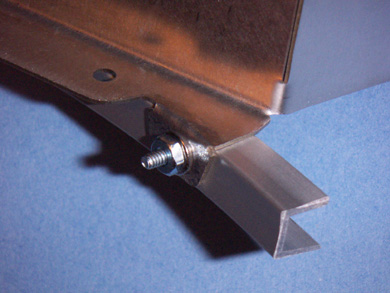
Price: $27   These are the Wrist Bands (or clamps) that hold the rubber arms to the Wrists. They are ideal for Will Huffs Silicone rubber arms, or any other rubber arms and wrists that are made to club specs. These Wrist Bands are completely accurate to what was on the original Hero Robot. In fact, I made an extra effort to ensure the ends have the correct and accurate radius, and screws. They will come with the appropriate screws, nuts and washers and are being sold in sets of two. These are precision laser cut from a type of Galvanized Steel that will prevent rusting, has excellent paintability, is weldable, but looks like regular steel. Please note, these are just the Wrist Bands and do not include the J-shaped Latch that would engage pins in the torso. The Latch is a separate part, not offered by me, and its a part usually left off most B9 replicas for a variety of reasons. However, these would be ideal to attach steel latches if you decided to go that route. Also note, these Wrist Bands are designed to fit Wrists with a back flange (that rubber arms attach to) that are about 7.0 inches in diameter which would include almost all club wrists sold in the last 20 years and the 3D printed wrists. Please measure your wrist to know how these will fit.
Good news however! The club has a new vendor, Andre Svacha. Andre will provide builders
with these vents and other parts. These parts will be made to the same higest quality that I have offered these past years. Please click on the link below to take you to Andre's vendor page where he sells these vents and other club approved parts: Price: $38
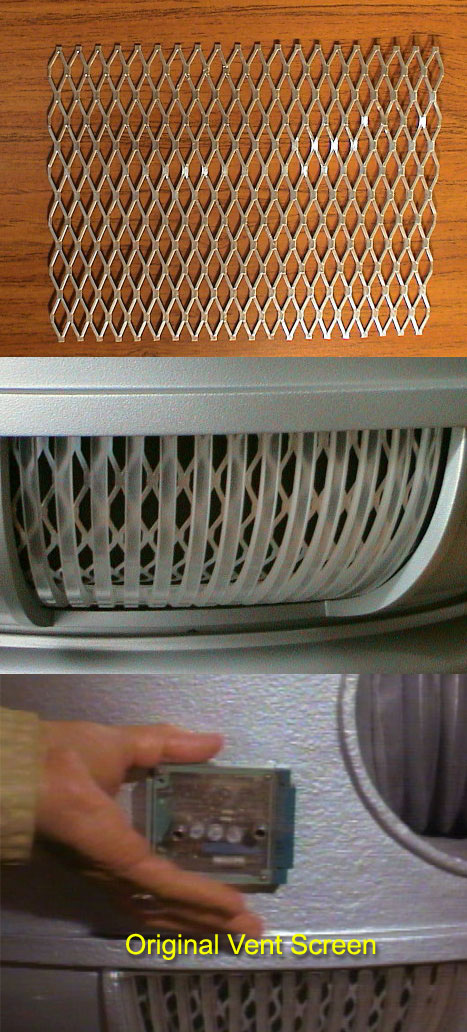
A set of three pieces of expanded aluminum screening for the side
and rear vents, as seen in the original robot (2nd/3rd season).
Each piece is 9.5" x 7.5" which is large enough
to cover the inside of any vent opening on any torso. The
expanded aluminum is very sturdy, but it can be bent by hand into
a curve to fit nicely behind your vents. Please note, prices
listed are for a set of THREE pieces.
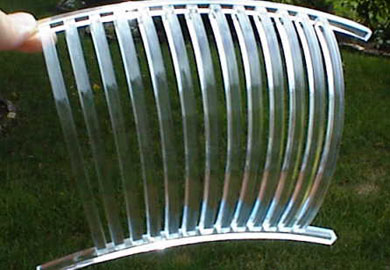
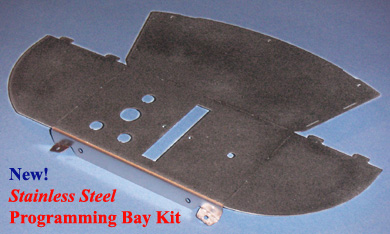
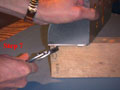
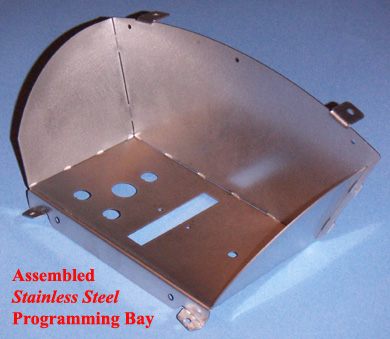
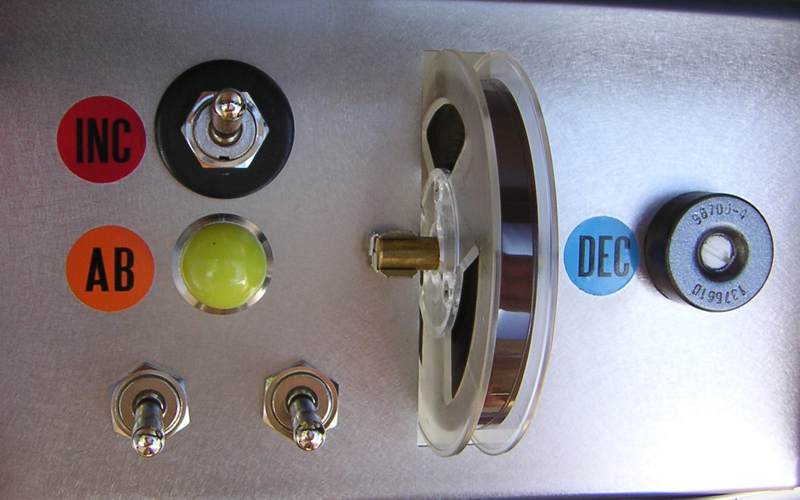
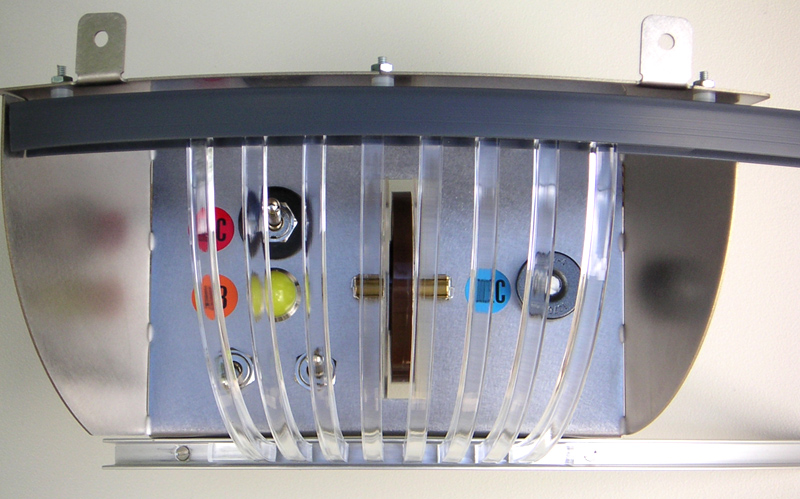
Price: $46 Introducing
the new Laser Cut Stainless Steel Programming Bay Kit! These
panels use a tab and slot design and are easy to bend and assemble.
The SSPB Kit comes with the bottom lip and top two attachment
tabs already pre bent, and the rest you can be bent by hand. Improved Design: This version of the Programming Bay incorporates some nifty new design changes to make attaching the lower aluminum channel much easier than previous versions. In fact, if you buy a set of Curved Channel Rails (see details below), the attachment holes and hardware will be included for FREE! The Beauty of
Stainless Steel: You don’t even need to paint it! Leave the
natural finish for a great look to your Programming Bay.
Front Vent in place - 1 Front Vent in place - 2
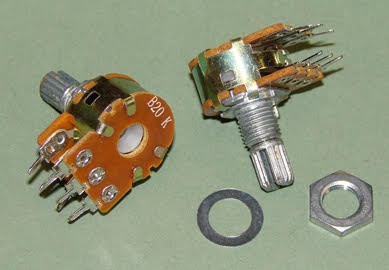
Price: $20  Want to make that Round Pot Thingy on the right side of the Programming Bay work as a volume knob for your Robot's voice or Background Sounds? Now you can! I have modified my Replica Potentiometer (Round Thingy) to fit on a real 20K Audio Taper Potentiometer including a set screw to secure it. Now you can use it to control your Robot's voice volume. Or, like I do, use it to control the volume of the Background sounds if you have an independent source for those. (I highly recommend that!) I am offering these individually for $20, or you can upgrade your Programming Bay Finishing Kit (PBFK) to a Deluxe PBFK for $10 Click on image for more detailed photo.
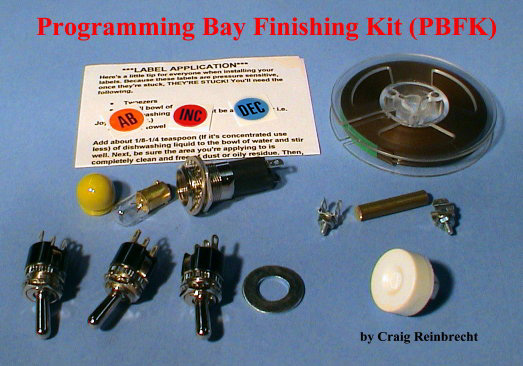
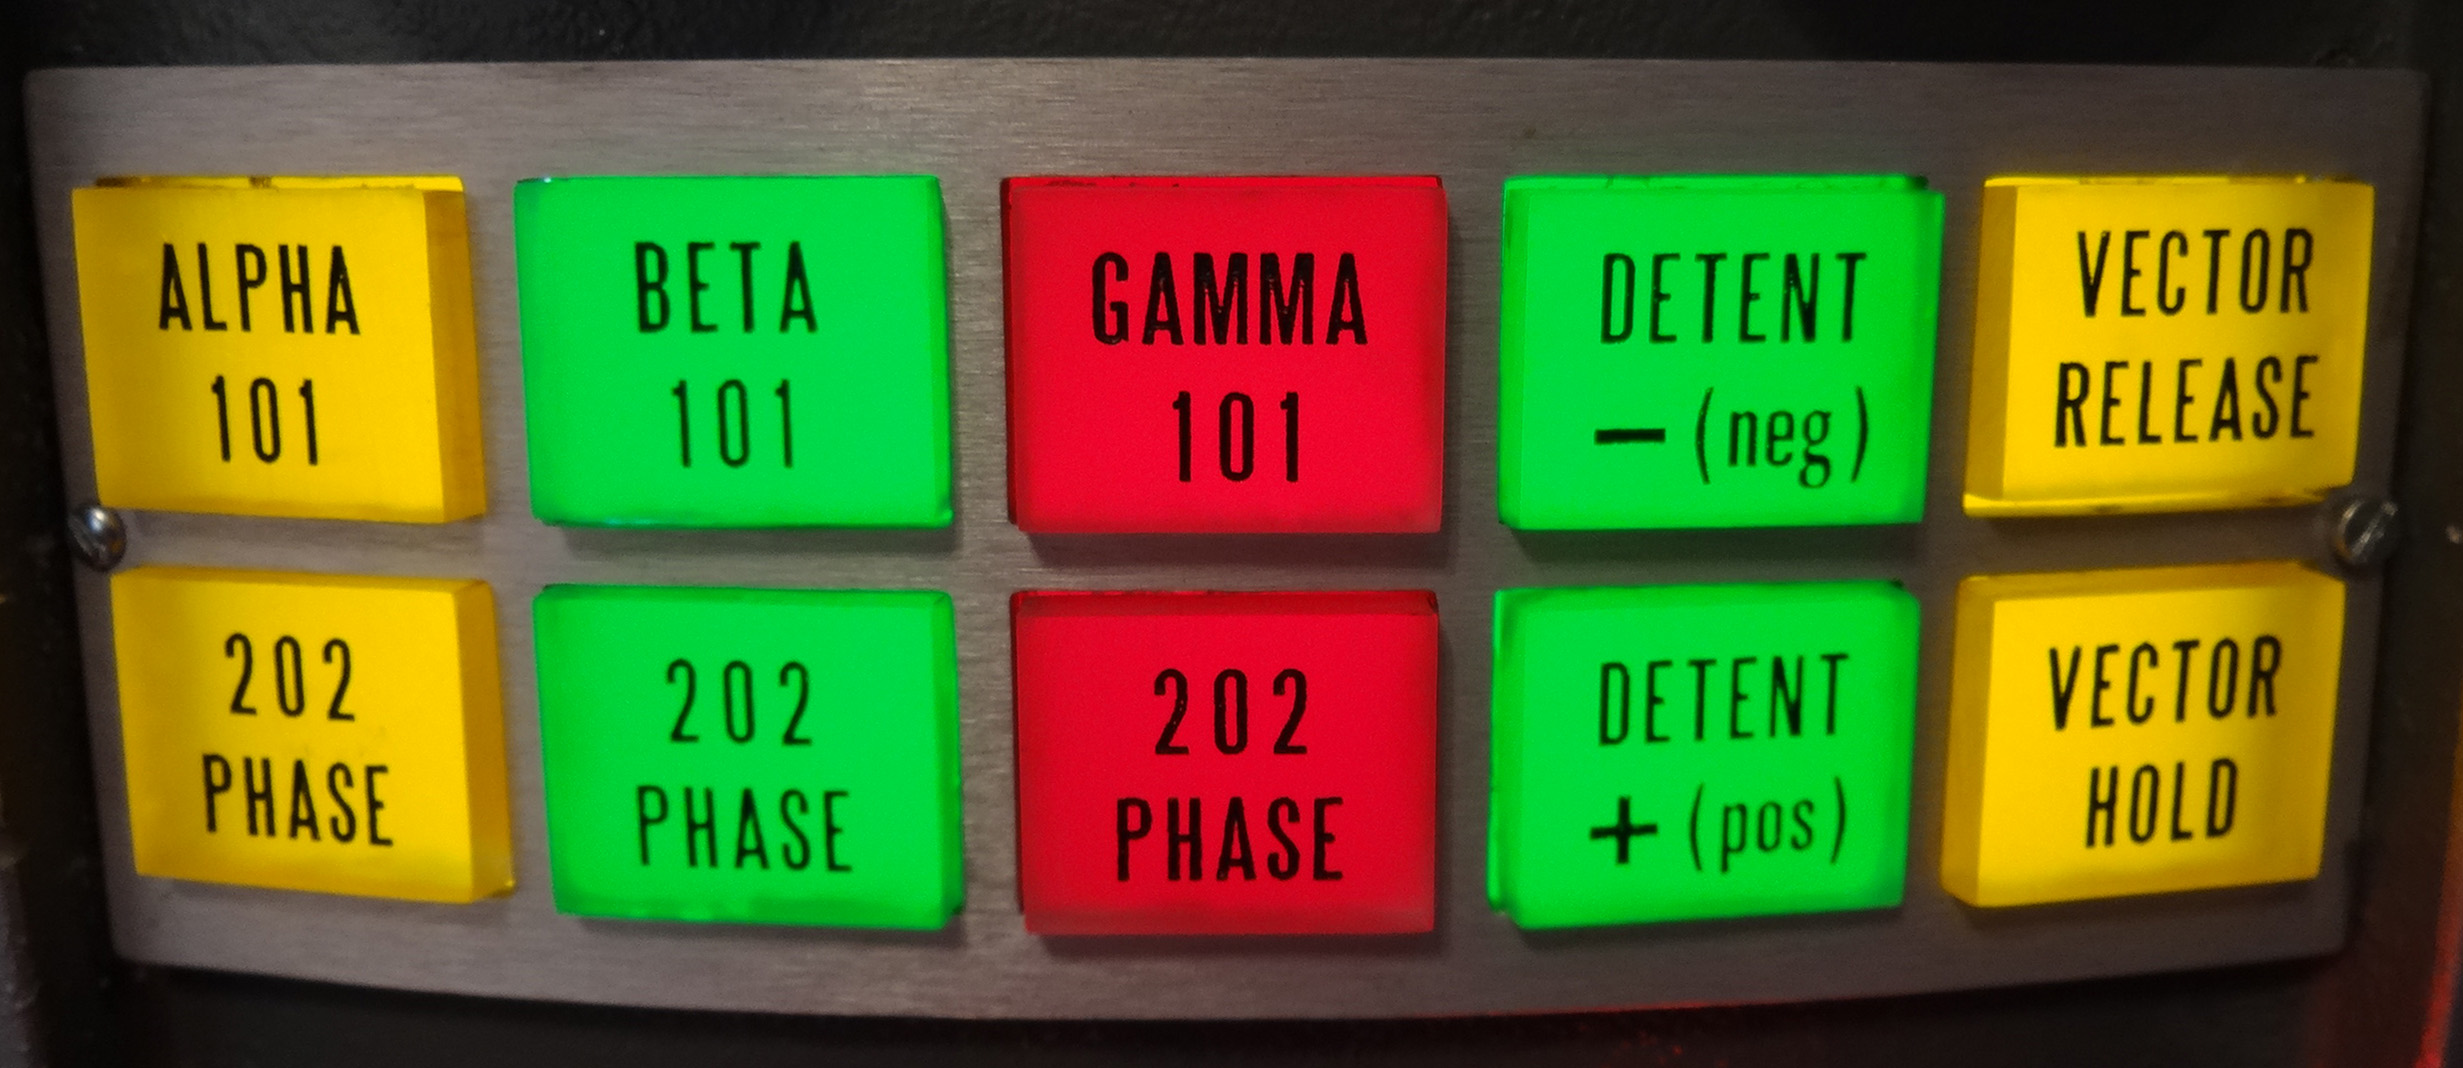
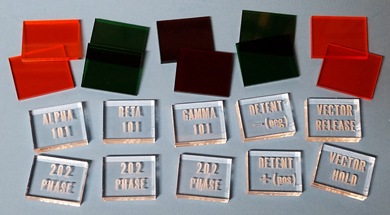
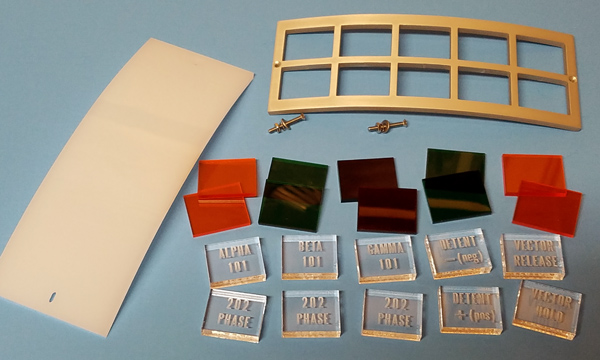
Price: $52 Here at long last! The part many have been waiting for... The Programming Bay Finishing Kit! This kit will include ALL the detailed parts required to finish off your programming Bay. The kit includes: * The 3 Labels
(INC, AB, DEC) with Application Instructions
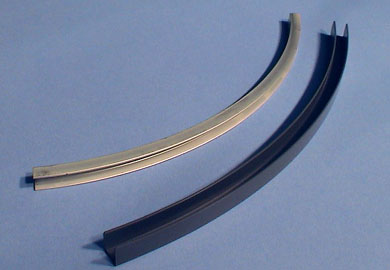
Price: $26
Attachment holes and hardware are included FREE for one set of Rails, when a Programming Bay Kit is purchased!
Curved Channel
Rail Pricing: Attachment holes
and hardware are included FREE for one set of Rails, when a Programming
Bay is purchased!
Combinations:
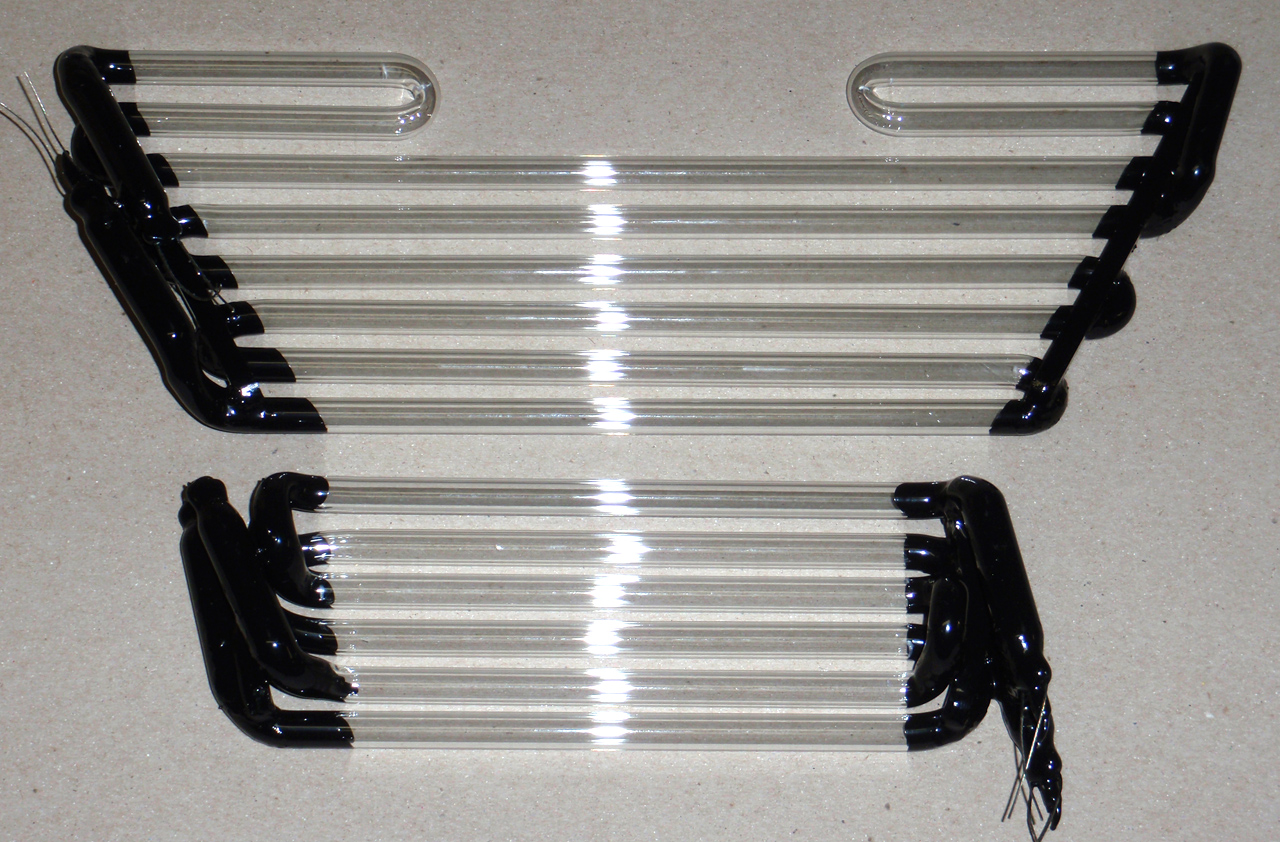
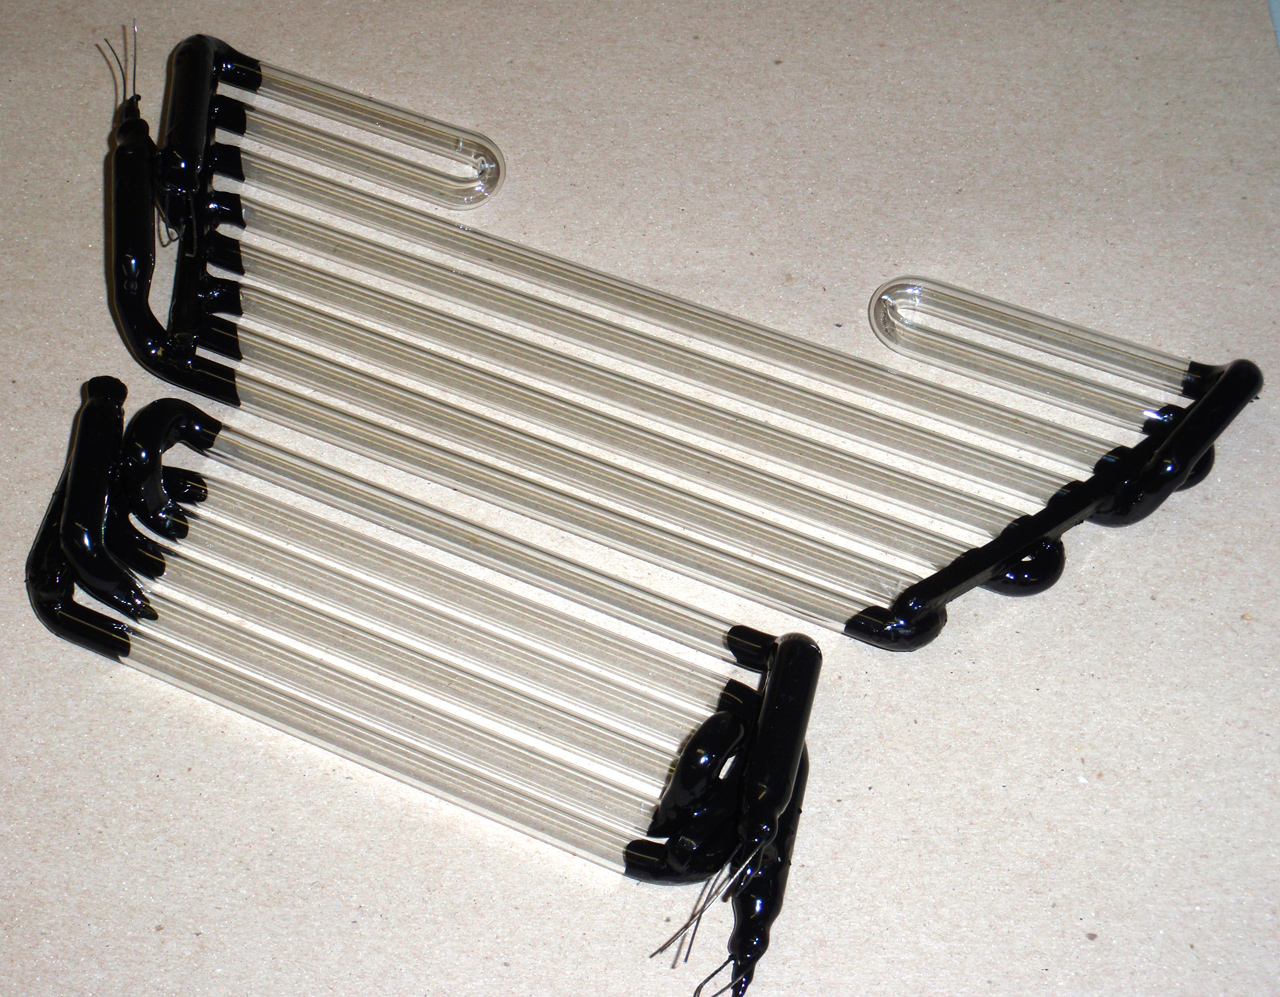
Price: $349 The Neon is one of the coolest features of our Robots! A real flashing Neon in person is simply mesmerizing and will have people in awe! Don't be intimidated. The club has great information available to help you get your neon installed properly and syncing to the Robot's voice. This Deluxe 12-Row Neon is the very highest quality authentic looking Robot neon available. My design uses 12 rows of 10mm tubing (plus the two loops at the top) to exactly match the Hero Robot as seen for most of the series. This neon comes in two sections; The top portion is curved to fit the torso for a nice flush fit and is all one piece, whereas the bottom section is a complex two-piece interlocking design, preassembled for easy installation. This robot neon is created by a talented neon artisan in Toledo, Ohio. Please understand that these neon sets are handmade, and may include some minor variations, but this is no different from the original. I do ensure each set of neon conforms to my strict standards for quality before it gets shipped. With the Deluxe Neon, I do a great deal of work preparing it after it comes from the neon shop before shipping it out. I glue bits of acrylic rod to the sides of the neon which makes it MUCH less fragile than the raw sets that come from the shop, and I ensure the row spacing is aligned perfectly. I also add blackout paint to the sides to give it a neat and finished look. Please note, because my work situation has improved considerably, wait times will only be from about 1 to 8 weeks, and it may often be in stock! No more long waits for Neon! NOTE 1: To make your neon flash to Robot sound files, I highly recommend Steve Neals Neon-Voice interface board over the Tech 22 music interface. Steves board is optimized for our Robot Neon and syncs perfectly. Both units require the 8KV neon Transformer and Zenor diodes fromTech22. NOTE 2: I highly recommend David Hubers Neon Backplate. I collaborated with David on this excellent part and it is the most authentic looking and highest quality Neon Backplate available. It will work with a v1 or v2 torso. NOTE 3: Neon is fragile and I insure it is packed extremely well. I guarantee it gets to you intact, however after that there is no guarantee against breaking and mishandling. In
Stock Now! Price: $39
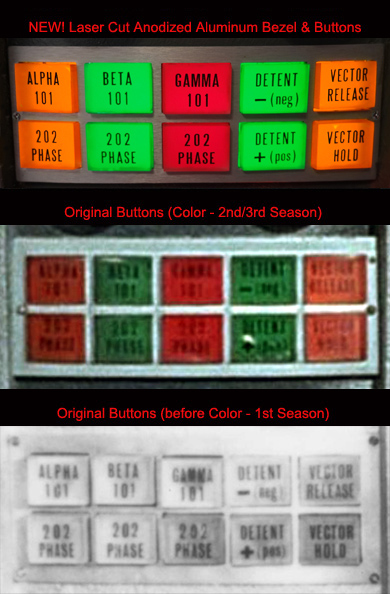
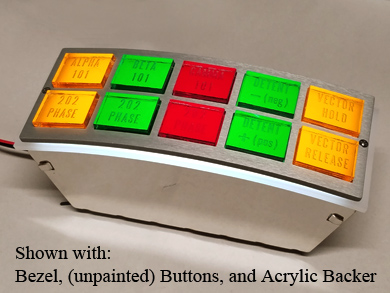
1/8" thick Laser Cut Aluminum Bezel styled after the
2nd/3rd season robot, completely finished requiring NO finishing
work. Also includes the two flat-head machine screws.
Get a Bezel and Button kit for only $68!! See the Package
Prices with Button Kit and Button Backer below.
In Stock Now! Price: $34
(Kit)
These are my NEW style matching colored acrylic buttons for the Laser Cut Aluminum Bezel, in a kit form. I created the font myself to match the original buttons exactly. The button tops are made of clear acrylic, and the flange pieces are made from translucent colored acrylic which gives the buttons their very vivid colors. This new style of buttons with colored flanges insures there is no white light seepage from around the buttons. The kit requires that you glue (solvent weld or Gorilla double sided tape) the clear buttons to the translucent colored flange pieces, and paint the engraved text black with acrylic paint available at any craft store. Gloss Black acrylic paint is recommended. (see the how-to videos below) New!
Also available at the same price are CLEAR buttons with translucent white flange pieces for that 1st Season look! Get
a Bezel and Button kit for only $68!! See the Package
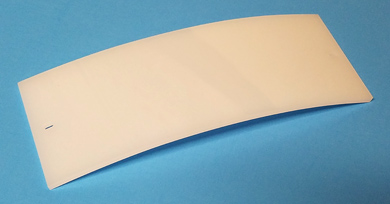
Prices with Bezel and Button Backer below. Price: $21 This is a curved opaque acrylic backer used to hold
the chest buttons firmly in place. It will work great with my Laser Cut Aluminum Bezel and Buttons, and Light Box (new!)
It should also work great with other bezels and buttons. The Button Backer is designed to install on the inside of the
torso, and the pre drilled mounting holes making it a snap to install with my Laser Cut Bezel
(other bezels may require drilling). The Acrylic Button Backer will also work great in conjunction with my NEW Stainless
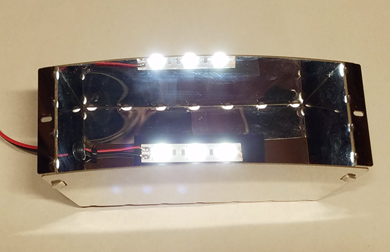
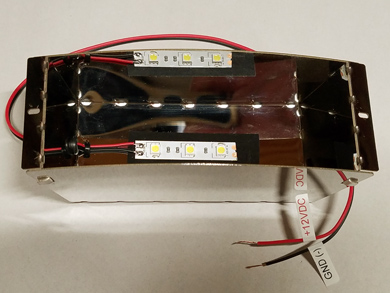
Steel Light Box! Price: $48 Introducing my all new LED Light Box to illuminate
the acrylic chest buttons! It is designed to easily mount behind my Aluminum Bezel and Button Backer.
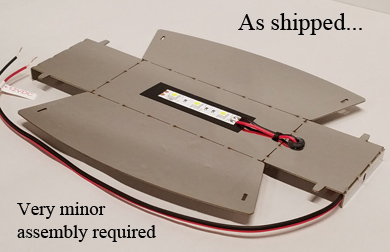
It comes with cool running, low power, bright LED lights already installed for very easy installation. My latest design ships "unfolded" , requiring some very light and easy final assembly (see video below).
Once assembled and installed, all you have to do is connect the LED power wires to +12VDC and Ground,
and you are good to go! Laser Cut Aluminum Bezel + Acrylic Button Kit - Price: $68 Laser Cut Aluminum Bezel + Acrylic Button Kit + Button Backer - Price: $87 Laser Cut Aluminum Bezel + Button Kit + Button Backer + S.S. LED Light Box
- Price: $132 Price: $25
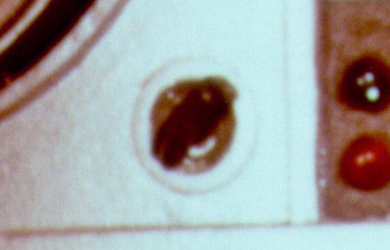
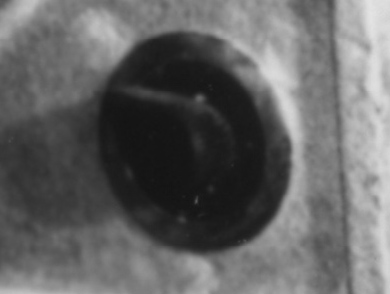
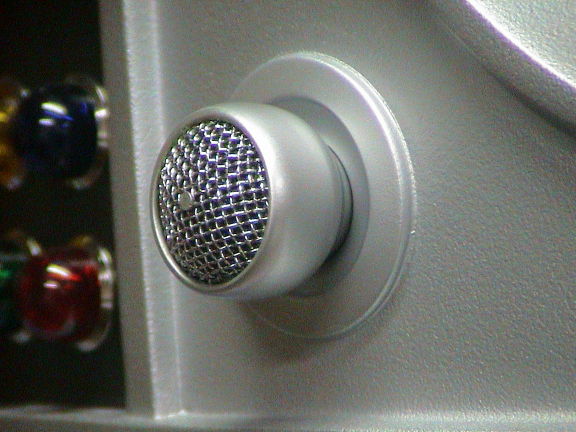
KNOB / MIC FLANGE RINGS: The Torso Knob Not a replica. This is a factory made knob like the one used on the original Hero Robot during most of the series. Early 1st Season Torso knob (Quantities limited!)
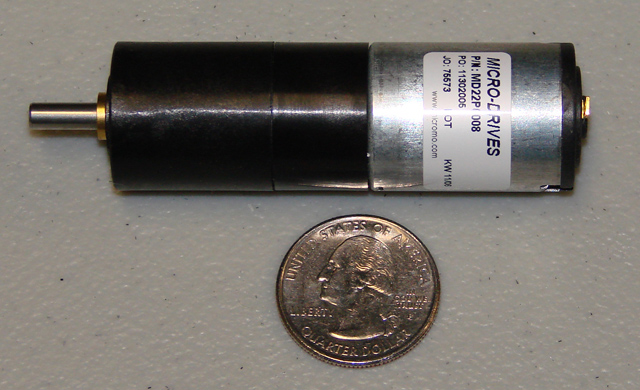
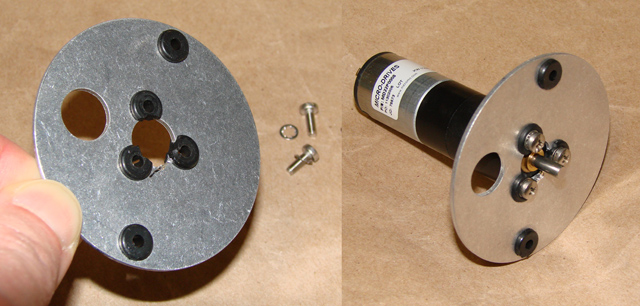
Not a replica. This is a factory made knob like the one used on the original Hero Robot during most of the first season. In Stock Now! This is a high quality Micromo 12V gearhead motor for turning the
Crown and Light Rod cam. The mounting plate allows you to mount the motor in the aluminum Neck Bracket (or other Neck Brackets) and
comes complete with noise damping rubber grommets. This motor turns at the optimal speed for our B9''s when fed by 6.7VDC. Price: $27 At long last, I am making my Power Pack Faux Board available to B9 Builders as a kit! The unfortunate reality in the B9 Building world is that there has never been an authentic looking Power Pack board available. Some have tried to get accurate boards made, but alas, it has never came to be. It seems the process to create an authentic looking 1950's/60's PCB is very difficult, to say the least. So when I decided to create a very accurate and authentic looking Power Pack Replica (link to article below), I needed to create a board with all the detail and the very prominent gold traces on the front. So how to solve this problem? Well, I had an idea, really born from my experience restoring a real Librascope Power Pack (link to article below). I had some great reference pictures of a real Librascope board, both my own, and some hi-resolution photos of an unmolested Librascope card. I took those good photos of the board, size corrected them in Photoshop, then digitally removed the components. Then I carefully glued the photos to a piece of Phenolic Glass Epoxy Laminate board, and created a very realistic, detailed Faux Board. To created the blank board in Photoshop I had to painstakingly recreate all the traces and text labels that were hidden by components in the photos. I also had to insure that the component holes precisely matched in the front and back photos. This was a LOT of work! and I am now glad to be able to share it with the rest of the B9 community. Please note that because this is not a real board, you cannot solder anything to it. But you can use silver epoxy and/or silver acrylic paint to faux solder the components. And it looks great! If done carefully it looks just like solder. Besides, your Power Pack doesn't need to function, a microswitch inside the torso engaged by one of the pins is the preferred method of making a functioning Power Pack.
**Please note: This is a challenging kit to build, but with patience and closely following the instructions, it can be done and the results will be amazing! Below are links to the instructions for this kit. You will also find links to two other articals, One on how I restored a REAL Librascope Power Pack and a second one on how I created a very authentic Power Pack Replica. This kit is born from these efforts. Before you order feel free to look them over and decide if this is a project for you. Don't be afraid to challenge yourself:
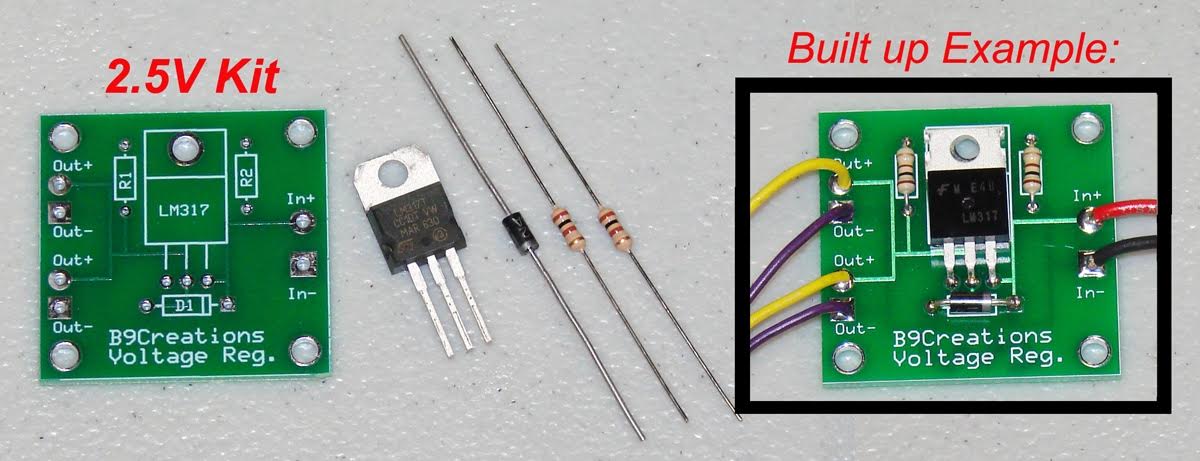
2.5V voltage regulators
2.5V voltage regulators
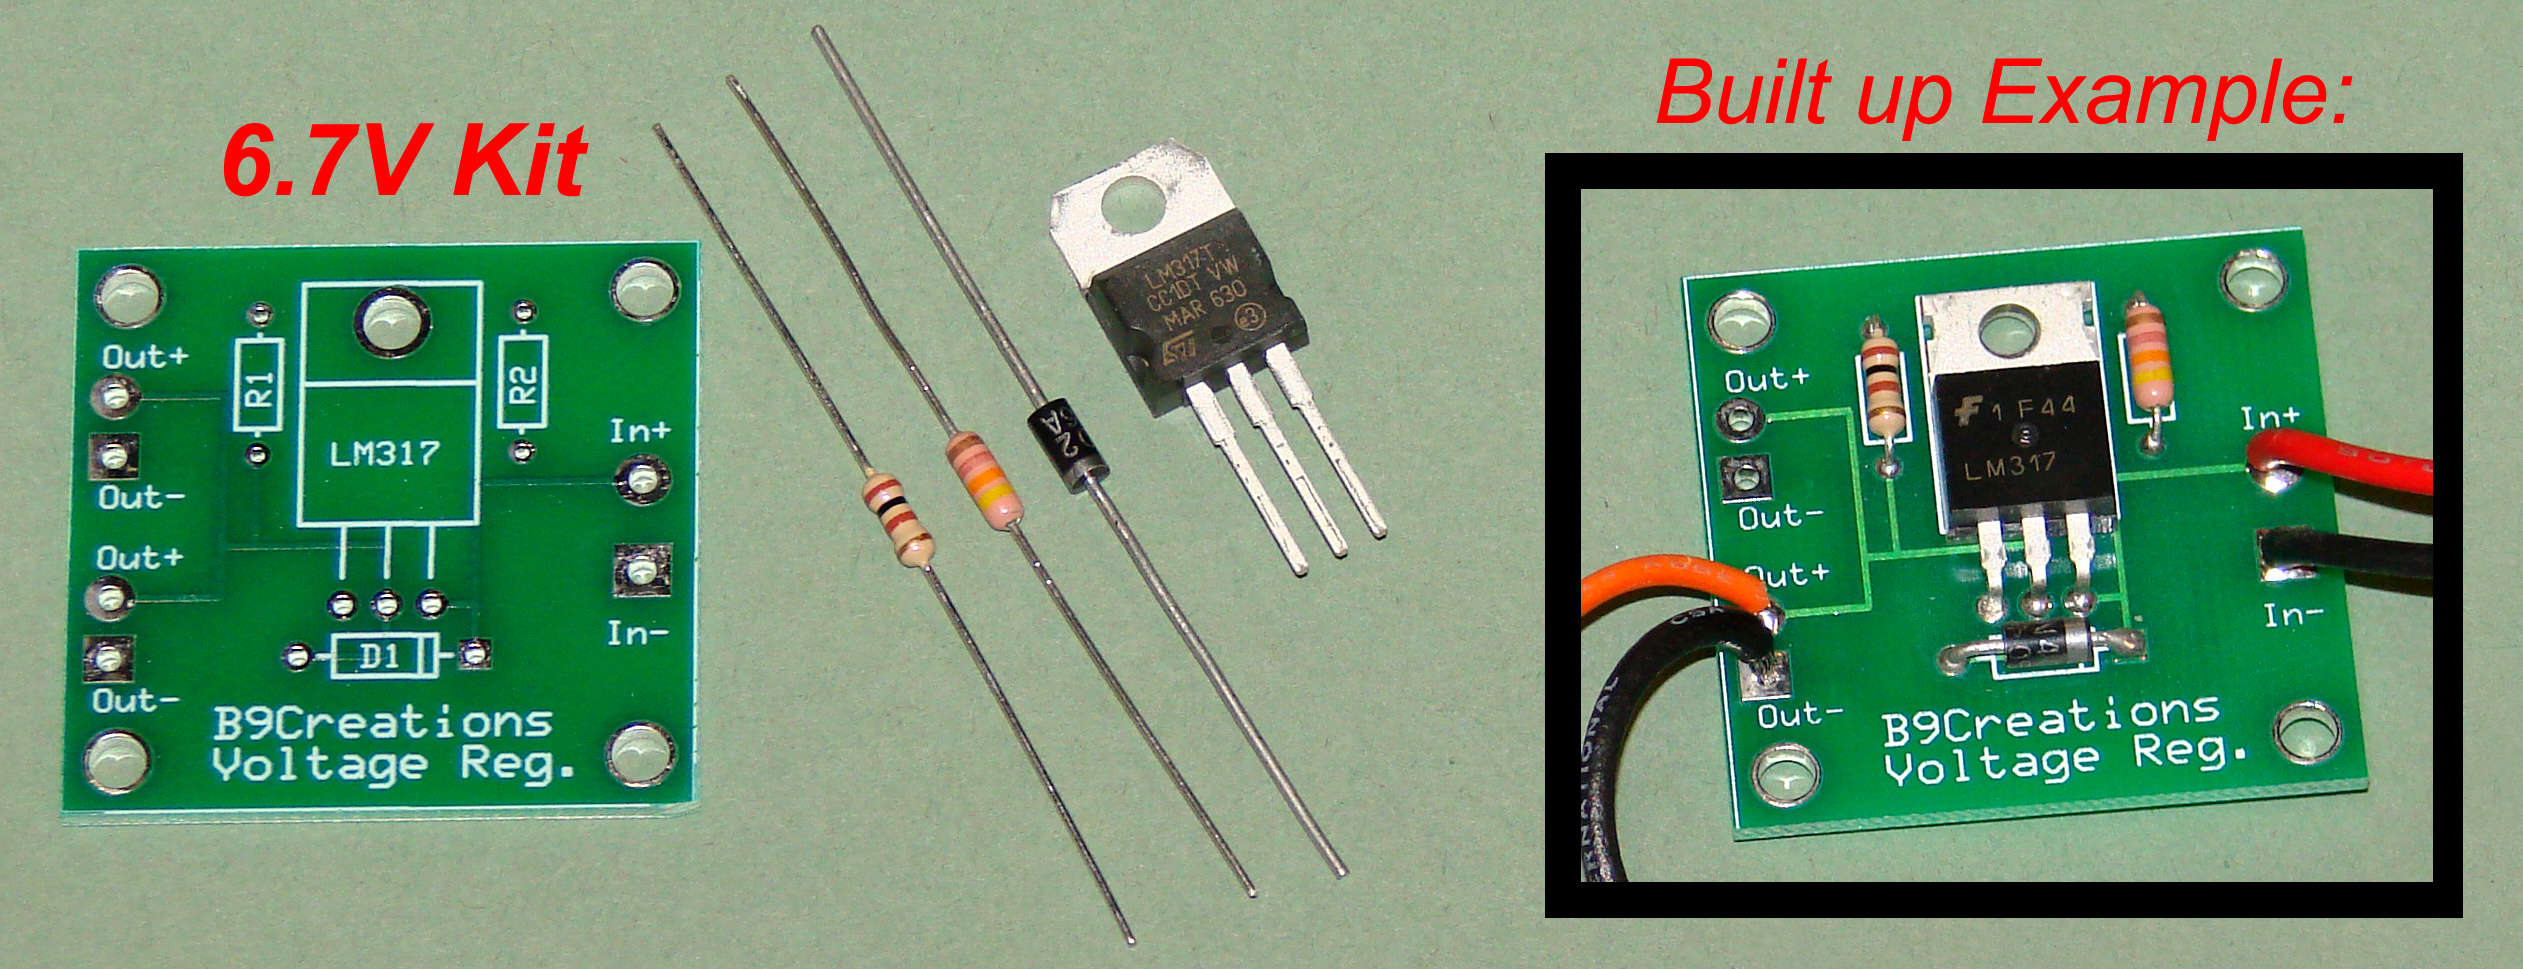
6.7V voltage regulators
Kit of Molex Connectors with pins
Stereo 1/8" phono jack
3.5mm (1/8 inch) Mini-Stereo Extension Cable
20K Audio Taper volume pot | |||
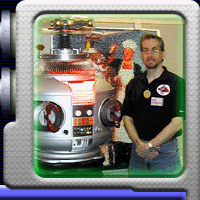
 Craig
Reinbrecht
Craig
Reinbrecht


